<header>
<h1>Installing a Reservation System on WordPress: A Comprehensive Guide for Developers & Entrepreneurs</h1>
</header>
<main>
<section id="introduction">
<h2>Introduction</h2>
In this guide, we'll walk you through the process of installing a reservation system on your WordPress site. We will focus on two popular plugins: AppointKart for appointment booking and WP Hotel Booking Engine for hotel bookings.
</section>
<section id="appointkart">
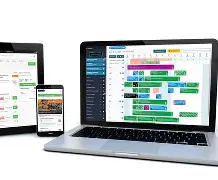
<h2>Setting Up AppointKart</h2>
<figure>
<img src="https://jmsilcom.com/wp-content/uploads/2026/03/comment_installer_un_moteur_de_reservation_sur_wordpress_0d30de.webp" alt="AppointKart Demonstration">
</figure>
To get started with AppointKart, you'll first need to install and activate the plugin. Once activated, create a new service and set your available appointment times. The front-end will display these times to your clients, allowing them to easily book appointments with you.
</section>
<section id="wp-hotel-booking">
<h2>Setting Up WP Hotel Booking</h2>
<figure>
<img src="https://jmsilcom.com/wp-content/uploads/2026/03/comment_installer_un_moteur_de_reservation_sur_wordpress_22d3ec.webp" alt="WP Hotel Booking Engine">
</figure>
For hotel bookings, we recommend using the WP Hotel Booking Engine plugin. Install and activate the plugin, then add your rooms, prices, images, and availability settings. Make sure to optimize your images for better booking rates.
</section>
<section id="conclusion">
<h2>Conclusion</h2>
By following this guide, you'll be able to easily install and configure a reservation system on your WordPress site. Whether you run an appointment-based business or a hotel property, these plugins will help streamline the booking process for both you and your clients.
</section>
</main>
<footer>
<!-- Add your footer content here -->
</footer>